
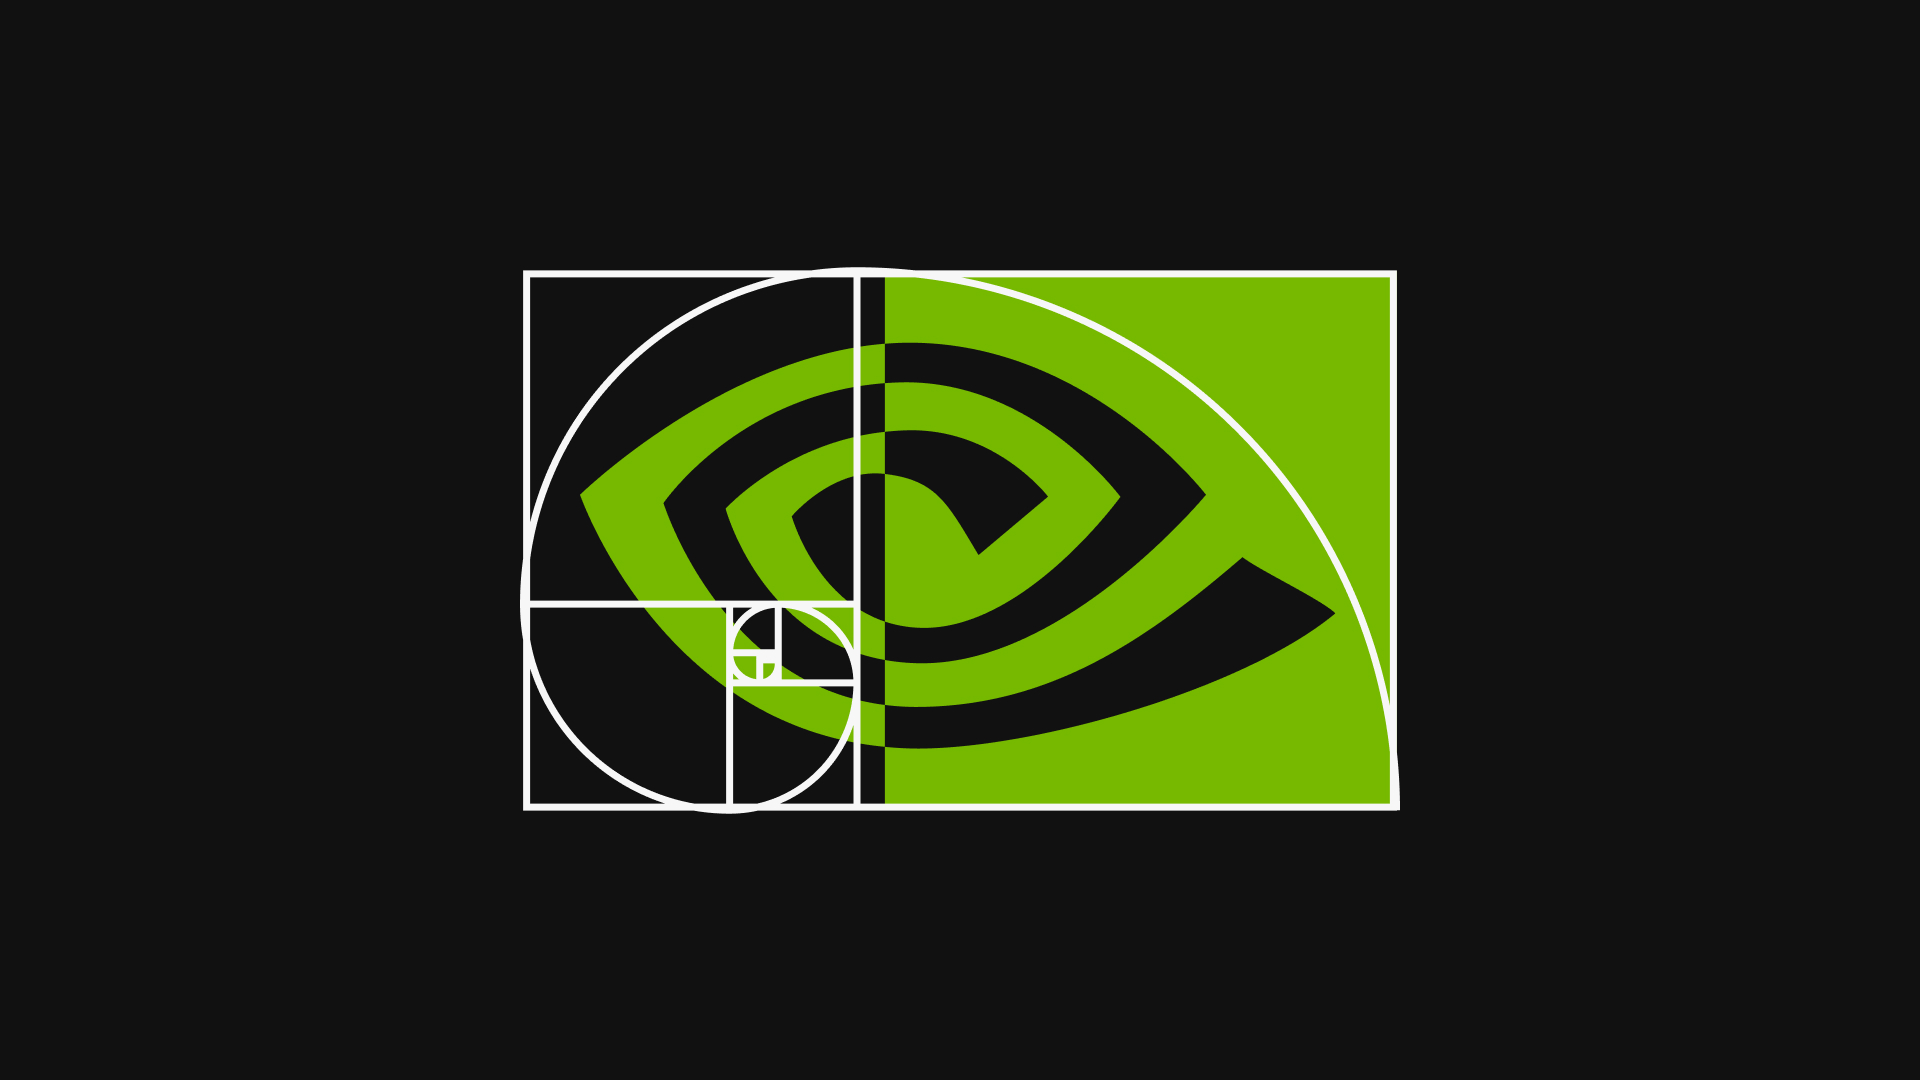
The golden ratio grid is the most photographed object in logo design and one of the least understood. Every few weeks a diagram of a famous mark wrapped in circles and spirals goes around, and a client asks whether their logo was built "on the golden ratio". This article explains what the ratio can and cannot do, how to build a proper golden ratio grid in Illustrator, and how to use it to check a mark and present it without overclaiming.
What the golden ratio is
The golden ratio, written phi, is about 1.618. It is defined by a proportion: a line split into a longer part a and a shorter part b is in the golden ratio when a divided by b equals a plus b divided by a. Solve that and you get 1 plus the square root of 5, divided by 2.
Two properties make it convenient for a grid. Its reciprocal is 0.618, so scaling by 61.8% and by 161.8% moves you down and up the same ladder. And a rectangle with sides in the ratio 1:1.618, the golden rectangle, has a useful habit: cut a square off one end and the leftover is another golden rectangle. Repeat and you get a nest of squares that shrink by 0.618 each time. The Fibonacci sequence (1, 1, 2, 3, 5, 8, 13, 21, 34, 55, 89) approximates the same ladder with whole numbers.
What it is not
It is not a guarantee of a good logo, and not a method on its own. A mark with sloppy stroke weights and a weak silhouette will not be rescued by a spiral drawn over it afterwards.
Be honest about the famous examples too. The claim that well known logos were designed on the golden ratio is widely repeated, but in many cases the diagram was drawn long after the logo, by someone other than the designer. Circles and arcs fit almost any curved mark if their sizes are free. That is retrofitting, and experienced art directors can see it.
What the ratio actually offers is a proportional system: one consistent relationship applied to several dimensions of a mark so they feel related. Any ratio can do that job; the root 2 rectangle of A series paper, a 3:4 rectangle or a plain square grid gives the same discipline. The golden ratio is a fine choice, not a magic one.
The golden rectangle and the spiral
The grid has three parts: the golden rectangle, the nested squares inside it, each 61.8% of the previous one and arranged in spiral order, and the golden spiral, a quarter circle drawn across each square and joined end to end. Strictly, the true golden spiral is logarithmic and the quarter circles approximate it, but the difference is far below any logo's resolution. From the squares you can also derive circles, one inscribed in each square and one for each arc, and these are what people usually mean by "constructed with the golden ratio".
Build the grid in Illustrator
Work on a new layer named Golden ratio grid, in a colour the artwork does not use. Sizes below assume a 1000 px wide rectangle; scale the whole grid later.
1. Draw the golden rectangle
Select the Rectangle tool (M) and click once on the artboard instead of dragging. In the dialog enter 1000 px wide and 618 px high, a golden rectangle to three decimals.
2. Cut the first square
Click again with the Rectangle tool and enter 618 by 618 px. Align it to the left edge of the rectangle with the Align panel (Window > Align, Shift+F7) or drag it until Smart Guides (View > Smart Guides, Cmd+U, Ctrl+U on Windows) snap it to the corner. The leftover strip on the right is 382 by 618 px, again a golden rectangle, on end.
3. Nest the remaining squares
The Scale dialog does the sizes for you. Select the square, choose Object > Transform > Scale, set Uniform to 61.8% and click Copy. Drag the copy into the leftover strip, snapping to its top corner, then repeat: select the newest square, scale by 61.8%, copy, snap into the next leftover. Each square turns a quarter turn clockwise around the eye of the spiral: right, then down, then left, then up.
| Step | Square side | Leftover rectangle |
|---|---|---|
| 1 | 618 px | 382 x 618 px |
| 2 | 382 px | 382 x 236 px |
| 3 | 236 px | 146 x 236 px |
| 4 | 146 px | 146 x 90 px |
| 5 | 90 px | 56 x 90 px |
| 6 | 56 px | 56 x 34 px |
| 7 | 34 px | 21 x 34 px |
Seven squares are plenty; past that they are smaller than the stroke of your grid.
4. Draw the spiral
Each arc is a quarter circle with a radius equal to the side of its square. It joins two opposite corners of the square, and its centre is the corner that points toward the eye of the spiral, where the squares converge.
To draw it exactly, select the Ellipse tool (L) and Option-click (Alt-click on Windows) that corner, which opens the dialog and centres the shape on the click. Enter twice the square's side for width and height. Cut the circle down to the quarter you need with the Scissors tool (C) at the two corners, or keep it whole as part of the construction. Once every arc is drawn, select them all and use Object > Path > Join (Cmd+J, Ctrl+J).
The Spiral tool, under the Line Segment tool, also draws spirals, but its Decay value does not map to phi; use it for a quick visual, not for a construction claim.
5. Add circles from the squares
Smart Guides label a square's centre when you hover over it. Option-click there with the Ellipse tool and enter the side of the square for both dimensions to inscribe a circle. Do this for the two or three largest squares only; every extra circle makes the grid harder to read.
6. Lock it, or make it guides
Group the grid (Cmd+G, Ctrl+G) and lock the layer. To make it snap like native guides, select it and choose View > Guides > Make Guides (Cmd+5, Ctrl+5). Guides lose their own stroke and take the colour set in Illustrator > Settings > Guides & Grid (Edit > Preferences on Windows), so keep an unconverted copy on a hidden layer for the case study. If you build this grid often, Anchr Grid draws it in one step on its own layer.
Use it to check a mark
Place the mark on the grid and scale the grid, not the mark, until one major dimension coincides: usually the overall width against the golden rectangle, or the symbol height against the first square. Then look, without moving anything else, at what lands where: the bounding box against the rectangle, the main counter against the second and third squares, and the ratio between heaviest and lightest stroke against adjacent steps in the ladder.
If you catch yourself sliding the grid to make a coincidence appear, the mark is not on the ratio. That is a fact about the mark, not a problem to fix in the diagram: adjust the mark deliberately, or accept that it works on a different logic.
Use it to check a wordmark
Letterforms come with proportions set by the typeface, so a golden spiral over a wordmark rarely means anything. Where the ratio helps is the lockup, the relationship between symbol and type: a symbol height of 1.618 times the cap height, a gap between symbol and wordmark of 0.618 of the cap height, or a stacked lockup whose overall shape is a golden rectangle. Pick one relationship, apply it, and check it with a single square from the ladder.
Present it in a case study
Say exactly what the grid did. "The lockup uses a 1:1.618 relationship between symbol height and cap height" is a defensible sentence. "Designed on the golden ratio" is not, unless the ratio drove the design from the first sketch.
Show one clean diagram with the mark, the rectangle and the two or three elements that genuinely coincide. Eleven circles, all slightly missing the curves, tell an experienced reader that the grid arrived after the logo. Draw it in one colour and one stroke weight so the mark stays the subject.
Alternatives worth knowing
A square base grid, at a module of one stroke width, is the most common basis for geometric marks. A modular grid with columns and gutters suits wordmarks and lockups. Circle based construction, where every curve belongs to a circle of a stated radius, gives a rigorous diagram for rounded marks. Isometric and hexagonal grids suit marks built from 30 and 60 degree angles. Each is a real method when used from the start, and each can be faked at the end.
Questions
Is the golden ratio the same as the rule of thirds?
No. The rule of thirds splits a frame into equal thirds, so its lines sit at 33% and 67%. Golden ratio divisions sit at 38.2% and 61.8%. That is close enough to confuse and far enough apart that a diagram labelled with one and drawn with the other looks careless. Choose one and name it.
Should I build the grid before or after designing the mark?
Before, if it is going to be a method. Build the ladder of squares, decide which dimensions of the mark map to which steps, and design within that. Afterwards it is only a checking tool, still useful, provided the case study describes it as a check rather than the origin of the design.
Can I use Fibonacci numbers instead of 61.8%?
Yes, for larger values. Successive Fibonacci numbers (34, 55, 89, 144) get closer to phi as they grow, and whole numbers are convenient in pixel work. Below 13 the approximation is rough: 8 divided by 5 is 1.6, not 1.618. At 1000 px, Fibonacci sizes are indistinguishable from exact ones.
Does Illustrator have a built-in golden ratio grid?
No. The document grid in Illustrator > Settings > Guides & Grid is square only, with a fixed spacing and subdivisions. A golden ratio grid has to be drawn as paths, as above, then optionally converted to guides with Cmd+5 (Ctrl+5). An extension can draw it for you, but the geometry is the same.
Do it in one click
Anchr Grid, one of the five tools in the Anchr Tools panel for Illustrator, draws base grids directly on your artboard: square, isometric, hexagonal and golden ratio. The golden ratio grid has a scale setting and a margin setting, so you can fit the rectangle to your mark instead of scaling the mark to a fixed rectangle. It lands on its own layer, named Golden Ratio Grid, and a Make Guides button converts it into native Illustrator guides when you want snapping. It never touches the artwork itself. Draw it, check the mark, and delete the layer if the ratio turns out not to be the story. Details and the trial are on the Anchr Grid page.
To see a logo's anchors, handles, base grid and clear space without opening Illustrator, drop it into the free logo grid generator. It runs in the browser and the file is never uploaded.